Matte porcelain tile is durable, but its textured surface can hold dust, grease, soap residue, and fine soil more easily than a polished surface. This guide explains how to clean and maintain matte sand limestone porcelain tiles without creating shiny patches, scratches, streaks, or permanent discoloration. It also covers the tools to use, the products to avoid, detailed cleaning steps, stain removal, and long-term prevention.
For product inspiration and finish information, visit .
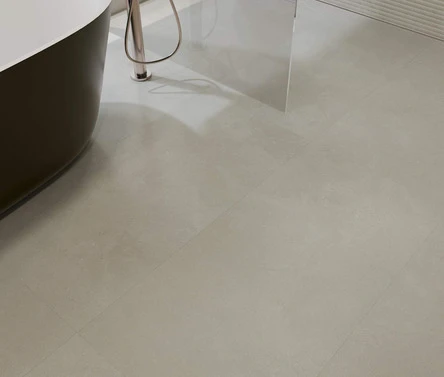
Understand Why Matte Porcelain Tiles Need Gentle Cleaning
Matte does not mean stain-proof
Matte porcelain tiles are manufactured with a low-sheen surface that reduces reflected light and creates a natural stone appearance. The finish is hard and resistant to normal household wear, but dust and residue can settle into small surface irregularities. This can make the floor look dull, cloudy, or uneven even when the tile itself is not damaged.
The most common maintenance problems include:
- Fine grit scratching the surface during dry or wet mopping.
- Soap film building up in bathrooms and shower areas.
- Grease and cooking residue sticking to kitchen floors and backsplashes.
- Hard-water deposits creating white or gray marks.
- Cleaner residue leaving streaks or sticky patches.
- Wax or polish creating unwanted glossy areas.
- Colored spills soaking into porous grout lines instead of the porcelain tile.
Porcelain tile and natural limestone require different care
Matte sand limestone porcelain tiles may resemble natural limestone, but porcelain is generally less absorbent and does not require the same sealing routine as most natural limestone. Do not assume that a limestone-look porcelain product should be cleaned with limestone-specific acidic products. Always follow the tile manufacturer's care instructions, especially when the tile has a textured, anti-slip, or digitally printed surface.
Prepare the Correct Tools and Cleaning Products
Required tools
Gather the following tools before cleaning. Using the right equipment prevents dirt from being dragged across the surface.
- Soft-bristle broom or a vacuum cleaner with a hard-floor setting.
- Vacuum crevice attachment for grout joints and corners.
- Microfiber dust mop.
- Clean microfiber mop with a flat head.
- Two buckets, one for cleaning solution and one for rinsing.
- Measuring cup for diluting cleaner accurately.
- Soft nylon brush for grout and textured areas.
- White microfiber cloths for spot cleaning.
- Plastic scraper for dried residue.
- Clean towels for drying the floor.
- Rubber gloves and suitable eye protection.
Recommended cleaning products
Choose products that remove soil without changing the appearance of the matte finish.
- Warm water for routine cleaning.
- A pH-neutral cleaner labeled for porcelain, ceramic tile, or hard floors.
- A manufacturer-approved alkaline cleaner for grease and heavy soil.
- Distilled water when hard-water streaks are a recurring problem.
- A small amount of mild dish detergent for limited grease spots, if approved by the tile manufacturer.
Products to avoid
- Wax, floor polish, and shine-enhancing products.
- Oil-based soaps that leave a film.
- Scouring powder and abrasive cream cleaners.
- Steel wool, metal brushes, and rough scouring pads.
- Strong acids, including hydrochloric acid and concentrated vinegar solutions.
- Bleach mixed with ammonia, acids, or any other cleaner.
- Unapproved sealers that can create patchy gloss or a slippery surface.
- Colored cleaning cloths that may transfer dye to light tile or grout.
Follow a Safe Routine Cleaning Process
First step: Remove loose dust and grit
- Remove furniture, rugs, and small objects from the cleaning area.
- Inspect the floor for sand, small stones, food particles, and other abrasive debris.
- Vacuum slowly using a hard-floor setting, or sweep with a soft-bristle broom.
- Pay special attention to entryways, beneath cabinets, along baseboards, and inside grout joints.
- Do not begin wet mopping until loose grit has been removed. Wet grit can act like sandpaper when pushed across the tile.
Second step: Mix a diluted pH-neutral solution
- Fill a clean bucket with warm water.
- Add the amount of pH-neutral cleaner stated on the product label.
- Do not add extra cleaner to make the solution stronger. Excess product often creates a sticky film and visible streaks.
- Prepare a separate bucket with clean rinse water.
- For a first-time cleaning or an unfamiliar product, test the solution on a hidden tile or spare tile.
Third step: Clean in small sections
- Dip the microfiber mop into the diluted solution.
- Wring the mop until it is damp rather than soaking wet.
- Clean an area of approximately 1 to 2 square meters at a time.
- Use straight, overlapping strokes instead of aggressive scrubbing.
- Rinse the mop frequently in the second bucket.
- Replace the rinse water when it becomes cloudy or dirty.
- For textured matte surfaces, move the mop in several directions so it reaches the shallow surface texture.
Fourth step: Rinse away cleaner residue
- Use a clean microfiber mop dampened with fresh water.
- Rinse each cleaned section before moving to the next section.
- Use distilled water if tap water leaves mineral marks.
- Never allow concentrated cleaner to dry on the tile.
Fifth step: Dry the surface
- Wipe the floor with a dry microfiber mop or clean towel.
- Dry around grout joints, door thresholds, and wall edges where water can remain trapped.
- Ventilate the room to speed up drying.
- Inspect the surface from several angles. A clean matte tile should look even, not glossy or cloudy in isolated areas.
Remove Common Stains Without Changing the Finish
Food, grease, and cooking oil
- Blot fresh grease with a clean paper towel or microfiber cloth. Do not spread the spill.
- Apply a diluted pH-neutral cleaner or manufacturer-approved alkaline tile cleaner.
- Leave the solution on the stain only for the time stated on the label.
- Agitate gently with a soft nylon brush or microfiber cloth.
- Rinse with clean water at least twice.
- Dry the area and repeat once if necessary.
Soap scum and bathroom residue
- Remove loose dirt from the area first.
- Use a cleaner specifically labeled for porcelain and compatible with the grout.
- Apply it to a small test area before treating the entire surface.
- Allow the cleaner to work without letting it dry.
- Scrub gently with a soft nylon brush.
- Rinse thoroughly to prevent a new film from forming.
- Dry the wall or floor after cleaning and use a squeegee after future showers.
Hard-water deposits
Mineral deposits can be difficult to remove without an acidic product. Do not use concentrated vinegar, lemon juice, or strong bathroom acid cleaners unless the tile and grout manufacturer specifically approves them.
- Try a porcelain-safe mineral deposit remover on an inconspicuous area.
- Protect nearby metal fixtures, natural stone, and cement-based grout if required by the label.
- Apply only the recommended amount.
- Do not leave the product on the surface longer than directed.
- Rinse several times with clean water.
- Dry the area and check for changes in color or texture.
Rubber marks and scuffs
- Remove loose dust from the area.
- Rub the mark gently with a damp microfiber cloth.
- If the mark remains, use a small amount of pH-neutral cleaner.
- For stubborn marks, use a white non-abrasive pad only after testing it.
- Rinse and dry the tile completely.
Rust and metal stains
Rust removers can damage grout, metal trim, and some decorative finishes. Use only a product labeled safe for porcelain tile. Apply it precisely to the stain, keep the contact time short, rinse thoroughly, and never scrub with a metal tool.
Clean Grout and Textured Areas Separately
Use a soft brush for grout joints
Grout often looks dirty before the porcelain tile does. A soft nylon brush is safer than a hard abrasive brush and can reach recessed joints without scratching the tile.
- Vacuum the grout lines to remove dry particles.
- Apply a diluted pH-neutral cleaner or grout-safe cleaner.
- Work on a small section at a time.
- Brush along the grout joint with light pressure.
- Wipe away loosened soil with a microfiber cloth.
- Rinse with clean water.
- Dry the grout and inspect for remaining discoloration.
Do not use grout colorants as a quick cleaning solution
Grout colorants and sealers can be useful when professionally selected and properly applied, but careless application can leave a visible border on matte porcelain tiles. Keep these products off the tile face unless the product instructions specifically permit contact and provide removal instructions.
Be careful with steam and pressure
Steam cleaners and pressure washers may be suitable for some porcelain installations, but they can force water into grout, damage caulked joints, loosen trim, or affect adjacent materials. Use them only when the tile, grout, installation system, and manufacturer instructions allow it. For most homes, a damp microfiber mop and a soft brush provide better control.
Use a Practical Maintenance Schedule
Daily or whenever dirt is visible
- Remove sand and grit from entryways.
- Wipe spills immediately, especially oil, coffee, wine, and colored sauces.
- Use mats at exterior doors, but choose mats with non-staining backing.
Weekly
- Vacuum or dust mop the entire floor.
- Damp mop with a diluted pH-neutral cleaner.
- Rinse the mop frequently and do not reuse dirty water.
- Clean high-traffic grout lines if soil is visible.
Monthly or when residue develops
- Inspect the floor under natural light for streaks, film, and uneven areas.
- Clean textured sections with a soft nylon brush.
- Wash or replace dirty entry mats.
- Check caulked joints, grout, and transitions for cracks or gaps.
Seasonally
- Perform a more detailed clean in kitchens, bathrooms, and entrances.
- Review the cleaner being used and confirm that it remains suitable for porcelain.
- Inspect for furniture scratches, loose trim, damaged grout, and trapped moisture.
- Ask the tile or grout manufacturer before applying any sealer or restoration product.
Avoid These Common Cleaning Mistakes
Using too much cleaner
More detergent does not create a cleaner surface. Heavy concentrations can leave a dull or sticky coating that attracts more dirt. Measure the product, follow the label, and rinse when necessary.
Scrubbing with abrasive materials
Steel wool, aggressive scouring pads, and gritty powders can create fine scratches or polished spots. These changes may be difficult or impossible to reverse. Use microfiber cloths and soft nylon brushes instead.
Cleaning before vacuuming
Wet mopping over sand and grit spreads abrasive particles across the floor. Always remove dry debris first, particularly around exterior doors and kitchen work areas.
Allowing dirty water to dry on the tile
Dirty water leaves soil and minerals behind as it evaporates. Work in small sections, change the rinse water often, and dry the surface after cleaning.
Applying wax or polish
Wax and polish can create glossy patches, increase slipperiness, trap soil, and make future cleaning more difficult. Matte porcelain should normally retain its original low-sheen appearance.
Using acidic products without testing
Acids may etch grout, damage nearby natural stone, corrode metal, and affect decorative surfaces. If a mineral deposit remover is necessary, test it first and use only a compatible product.
Dragging furniture across the floor
Lift furniture when possible. Attach clean, non-staining felt pads to chair legs and table legs, and replace them when they collect grit. Do not use damaged plastic or metal feet directly on the tile.
Protect the Original Matte Finish for the Long Term
Control the dirt entering the room
- Place absorbent mats inside and outside entrances.
- Use mats with backing that will not stain or soften the tile surface.
- Keep outdoor soil away from the floor by cleaning footwear regularly.
- Use runners in busy corridors and replace them when they become dirty.
Respond to spills quickly
- Blot liquids immediately.
- Remove solid material with a plastic scraper or paper towel.
- Clean the area with a suitable diluted cleaner.
- Rinse and dry the surface.
- Inspect grout separately if the spill was strongly colored or oily.
Confirm the installation and product specifications
Long-term maintenance depends on more than cleaning. Ask the tile supplier or installer about the tile's absorption rate, surface texture, slip-resistance treatment, grout type, and recommended cleaning chemicals. Keep spare tiles and product documentation for future repairs or product testing.
When to call a professional
Contact a qualified tile or stone-care professional when the floor has permanent discoloration, widespread cleaner buildup, damaged grout, efflorescence, scratches, or an unknown coating. Professional testing is safer than repeatedly applying stronger chemicals.
With frequent dust removal, a diluted pH-neutral cleaner, careful rinsing, and quick spill response, matte porcelain can remain clean without losing its natural appearance. This method is especially suitable for matte sand limestone porcelain tiles, helping preserve the soft stone-inspired look associated with Cromatismo products without adding unwanted shine or damaging the finish.


